
Connect Flutterwave to WordPress — Your Complete Setup Guide
If you run a WordPress site and need to accept payments from customers, clients, or supporters anywhere in the world, knowing how to connect Flutterwave to WordPress is one of the most practical skills you can learn in 2026.
Flutterwave supports over 30 currencies, accepts credit cards, debit cards, bank transfers, mobile money, USSD payments, and more. It is used by businesses and individuals across Africa, the UK, the US, Canada, and Europe. Whatever you are selling or collecting money for on your WordPress site, Flutterwave can handle the transaction.
This guide covers four different ways to connect Flutterwave to WordPress, from the simplest no-code method to the most flexible developer approach. By the end, you will know exactly which method fits your situation and how to set it up from scratch.
What You Need Before You Start
Before you connect Flutterwave to WordPress using any of the four methods below, make sure you have these three things in place.
- A Flutterwave for Business account. Sign up at onboarding.flutterwave.com if you do not have one yet. You will need to verify your identity and business details during registration.
- Your Flutterwave API keys (Public Key and Secret Key). You will find these under Settings, then API Keys inside your Flutterwave dashboard. You will need to generate the secret key if you have not done so already.
- A WordPress site with admin access. You need to be able to install plugins and make changes to your site settings.
Method 1: Flutterwave WooCommerce Plugin
Best for: Online stores selling physical products, digital downloads, or subscriptions
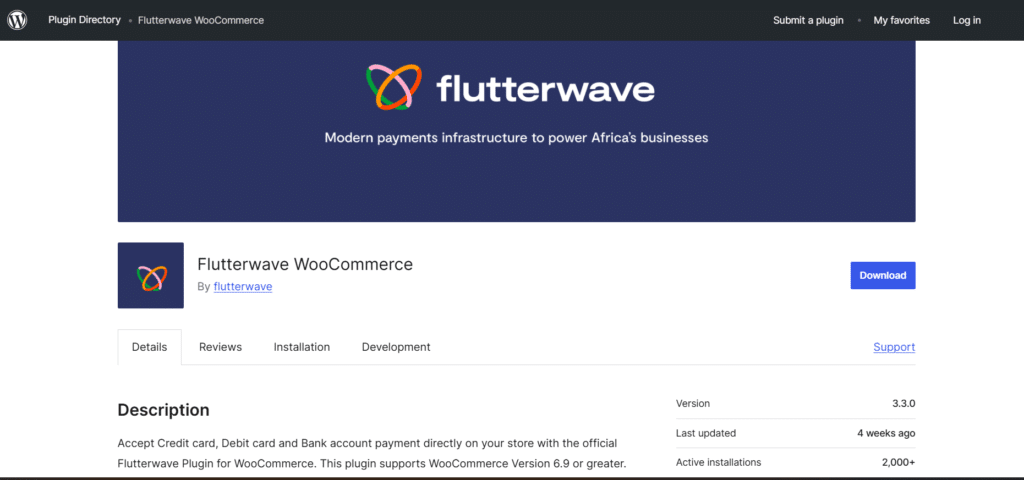
The most complete way to connect Flutterwave to WordPress for an e-commerce setup is through the official Flutterwave WooCommerce plugin. This method works if you are running WooCommerce version 6.9 or above and want Flutterwave to appear as a payment option at checkout for your customers worldwide.
The plugin supports card payments, bank account payments, mobile money, bank transfers, USSD, Barter, and 1voucher. It also supports recurring payments through WooCommerce Subscriptions and split payments between multiple recipients, making it suitable for marketplace-type setups.
Step 1: Install WooCommerce. Go to your WordPress dashboard, click Plugins, then Add New, search for WooCommerce, install it, and activate it. If WooCommerce is already installed and active, move to the next step.
Step 2: Install the Flutterwave WooCommerce Plugin. Click Plugins, then Add New again. In the search bar, type Flutterwave WooCommerce. The official plugin by Flutterwave will appear. Click Install Now and then Activate.
Step 3: Configure the Plugin. Go to WooCommerce, then Settings from the left menu. Click the Payments tab. You will see Flutterwave listed as a payment option. Click on it to open the settings.
Step 4: Enter Your API Keys. Paste your Flutterwave Public Key and Secret Key into the fields provided. Toggle the plugin to Live Mode when you are ready to accept real payments. Test Mode is available for testing before going live.
Step 5: Add Your Webhook URL. Copy the webhook URL from the plugin settings and paste it into your Flutterwave dashboard under Settings, then Webhooks. Add a hash secret to encrypt communications between your site and Flutterwave. This step is optional but strongly recommended for security.
Step 6: Test Before Going Live. Place a test order on your WooCommerce store while in Test Mode and complete the payment using a Flutterwave test card. Once everything works correctly, switch to Live Mode.
Method 2: Flutterwave via Paymattic
Best for: Accepting payments through WordPress forms, donations, subscriptions without WooCommerce
If you do not need a full e-commerce store and just want to connect Flutterwave to WordPress to collect payments through custom forms, whether for donations, registrations, consultations, services, or digital downloads, Paymattic is the cleanest solution available.
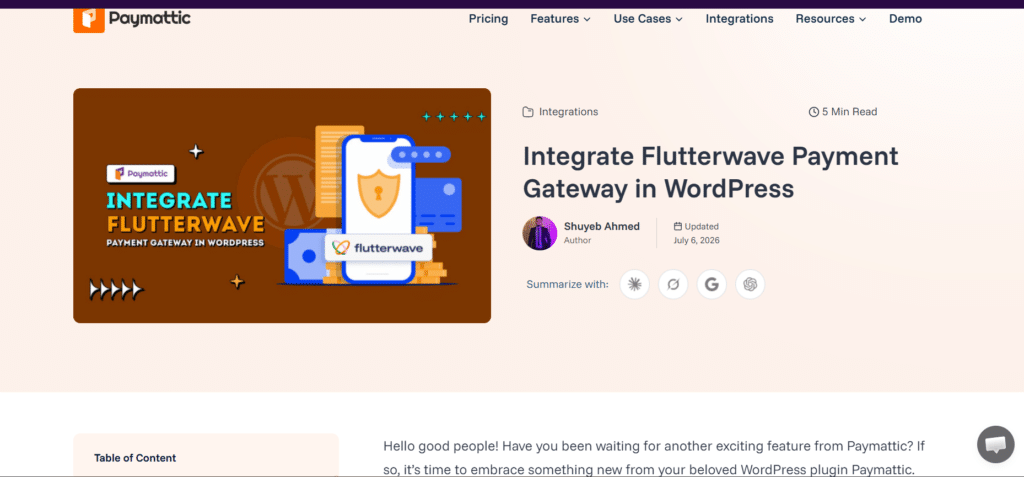
Paymattic is a WordPress payment form plugin that integrates Flutterwave natively. It supports card payments, mobile money, bank transfers, and USSD, and works across all the currencies Flutterwave supports. This method does not require WooCommerce at all.
Step 1: Install Paymattic. Go to Plugins, then Add New in your WordPress dashboard. Search for Paymattic, install and activate it. Note that the Flutterwave integration requires Paymattic Pro.
Step 2: Activate the Flutterwave Gateway. In your WordPress dashboard, go to Paymattic (Pro), then Payment Gateways. Click the Flutterwave icon from the sidebar. Press Install and Activate.
Step 3: Enter Your API Keys. On the Flutterwave settings page inside Paymattic, paste your Flutterwave Public Key and Secret Key. Select Live Mode when ready to go live.
Step 4: Set Up Your Webhook. Copy the webhook URL from the Paymattic Flutterwave settings page. Log in to your Flutterwave dashboard, go to Settings, then Webhooks, and paste the URL. This ensures your site is notified when payments complete.
Step 5: Build Your Payment Form: Create a new form inside Paymattic, add your payment fields, set the amount, and publish the form on any page or post. Your visitors can now pay through Flutterwave directly on your WordPress site.
Method 3: Flutterwave Payment Links Embedded on WordPress
Best for: Simple payment collection with no plugins or technical setup required
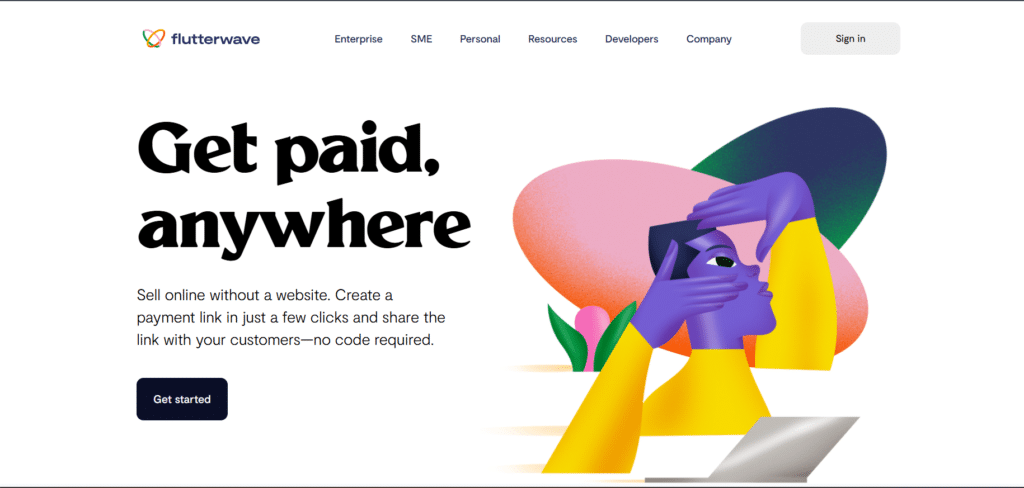
This is the fastest and simplest way to connect Flutterwave to WordPress without installing any plugin at all. You generate a payment link directly from your Flutterwave dashboard and embed it anywhere on your WordPress site as a button or hyperlink.
This method works for anyone who needs to collect a fixed payment amount, sell a single product, accept a service fee, or receive donations without building a full checkout system. It requires no API keys on the WordPress side and takes under ten minutes to set up.
Step 1: Log In to Your Flutterwave Dashboard. Visit your Flutterwave dashboard and navigate to the Payment Links section, sometimes listed under Tools or Accept Payments depending on your dashboard version.
Step 2: Create a Payment Link. Click Create Payment Link. Set the amount, currency, and a description for what you are collecting payment for. You can create a fixed-amount link or a flexible link that lets the payer enter their own amount.
Step 3: Copy Your Payment Link. Once the link is created, copy the unique URL generated by Flutterwave.
Step 4: Add It to Your WordPress Site. Go to your WordPress editor, create a button or add a hyperlink in any page or post, and paste the Flutterwave payment link as the destination. When a visitor clicks the button, they are taken to a secure Flutterwave checkout page. After payment, they are redirected back to your site.
Tip: Payment links are ideal for freelancers, coaches, course creators, and anyone who wants to start collecting payments quickly without a complex setup. You can use different links for different products or services.
Method 4: Flutterwave Inline API Integration
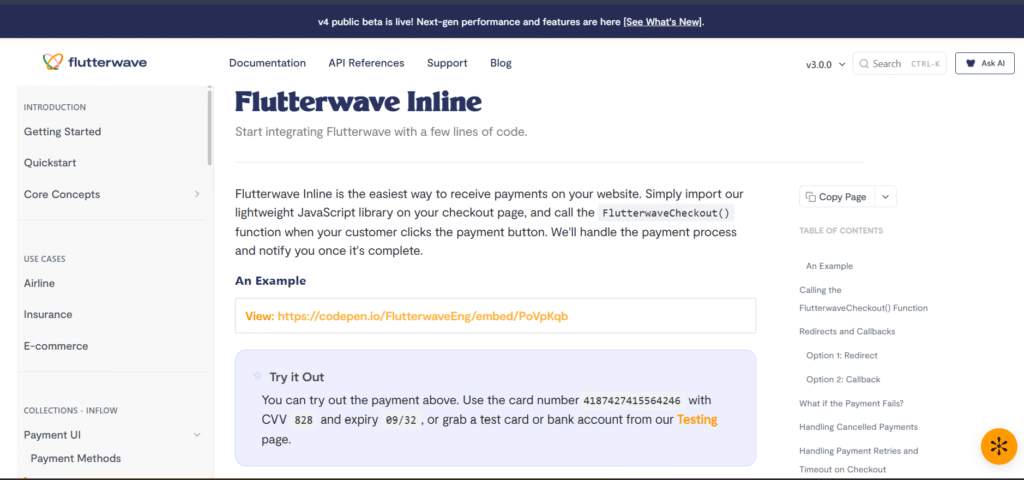
Best for: Developers who need a fully custom payment experience on WordPress
The Flutterwave Inline API method is the most flexible way to connect Flutterwave to WordPress. Instead of relying on a pre-built plugin, you use Flutterwave’s JavaScript SDK to trigger a payment popup directly from your site with full control over the look, feel, and behavior of the payment form.
This method requires some basic knowledge of JavaScript and either the Code Snippets plugin or direct access to your theme’s functions.php file. It is best suited for developers or technically comfortable users who want a seamless, embedded payment experience without redirecting customers to an external page.
Step 1: Get Your API Keys. Log in to your Flutterwave dashboard and copy your Public Key from Settings then API Keys.
Step 2: Add the Flutterwave Script to WordPress. Install the free Code Snippets plugin from the WordPress plugin directory. Create a new snippet and add the Flutterwave JavaScript script tag to load the SDK on your site.
Step 3: Create a Payment Button. In your page or post, add an HTML block with a button element. In your snippet code, write the JavaScript function that fires the Flutterwave inline payment modal when the button is clicked, passing in your public key, customer details, amount, and currency.
Step 4: Handle the Callback. Configure the callback function in your JavaScript to handle what happens after a successful payment. You can redirect to a thank-you page, display a success message, or trigger any other action your site needs.
Which Method Should You Use?
The right method depends entirely on what your WordPress site is built to do.
- Use Method 1 (WooCommerce Plugin) if you run an online store with a product catalogue, need customers to complete checkout on your site, or want recurring subscription billing.
- Use Method 2 (Paymattic) if you collect variable payments through forms, run a membership site, accept donations, or want to embed payment collection without building an e-commerce store.
- Use Method 3 (Payment Links) if you need the fastest possible setup with zero technical work, sell a single product or service, or just want to start accepting payments today with no plugins.
- Use Method 4 (Inline API) if you are a developer or technically comfortable user who needs full control over the payment experience and wants the checkout to happen on your site without any redirects.
Common Issues When You Connect Flutterwave to WordPress
Even when you follow the steps correctly, a few issues come up regularly. Here is what to watch for.
API key mismatch: If payments are failing with an authorisation error, double-check that you have pasted the correct Public Key and Secret Key. Test keys and live keys are different. Using test keys in live mode will cause all transactions to fail.
Webhook not responding: If your dashboard is not updating after payments, check that your webhook URL is correctly entered in Flutterwave and that your WordPress site is not blocking incoming webhook requests. A firewall or security plugin can sometimes block Flutterwave’s server communications.
WooCommerce compatibility: The official Flutterwave WooCommerce plugin requires WooCommerce version 6.9 or above. If you are running an older version, update WooCommerce first or install the older plugin version (2.3.6 or lower) from the GitHub repository.
Test mode left on: A common mistake after testing is forgetting to switch the plugin from Test Mode to Live Mode before announcing the site to customers. Always verify you are in Live Mode before launch.
Conclusion
Knowing how to connect Flutterwave to WordPress opens up a reliable and globally recognised payment infrastructure for any type of website.
Whether you are running an online store, a freelance services page, a donation platform, or a custom application, one of the four methods in this guide will match your setup exactly.
Start with Method 3 if you want to get paid today without any setup time. Move to Method 1 or 2 as your site grows, and your payment needs become more structured. And if you are building something custom from the ground up, Method 4 gives you the full flexibility that Flutterwave’s API infrastructure was designed to support.
The integration is straightforward once you have your API keys ready. Most setups take under 30 minutes from start to first live transaction. There is no reason to delay. Let me know if you run into any issues; I can assist you.

Chimezie Duru is a Lagos-based Digital Entrepreneur, Wikipedia Editor & Biography Writer, Affiliate Marketing Strategist, IT Consultant, and Blogging Coach with over 6 years of experience building and monetizing blogs in Nigeria’s digital space. He is the founder of InkRise Academy (InkRise Digital Concepts) and creator of the Ink To Income Masterclass. A 9-module blogging course for aspiring Nigerian & African writers and bloggers covering SEO, content strategy, and monetisation.
As the creator of AffiliatePlog.com, Chimezie writes from real experience on Wikipedia editing & biography writing, affiliate marketing, online earnings, and digital tools for Nigerian freelancers and content creators. He also works as a freelance Business and Data Analyst, IT Consultant & System Administrator, bringing an analytical edge to every content and business decision.

Most of our clients tell us the same thing: more qualified leads, faster, at a fraction of what they were paying for ads. Vantovo’s AI-driven targeting makes that possible. No contract. Cancel anytime. First 7 days free.
https://blankslatelife.com
No more set-it-and-forget-it campaigns that slowly lose relevance. Vantovo’s system re-scores performance frequently and adapts daily based on real visitor outcomes. Try keyword and location targeting free for 7 days—no contracts, cancel anytime.
https://cutt.ly/Myffbno7
No bidding wars, no keyword spreadsheets. Vantovo’s AI scores keyword performance every few minutes and shifts your traffic toward what’s actually converting, automatically. First 7 days are free.
https://cutt.ly/kyffveQl
Your competitors are still manually bidding on keywords and hoping for the best. Vantovo’s AI does that work continuously, adjusting targeting in real time so you never overpay for traffic that isn’t converting. Try it free for 7 days.
https://cutt.ly/LygS6Jep
Why keep spending on traffic that doesn’t convert well? Switch to an adaptive system that targets by keywords and locations across a partner network and improves with every campaign day. Try it free for 7 days—no contracts required and cancel whenever.
Get more information and start your free trial here: https://cutt.ly/SygS6OAZ
Hi there,
We run an Instagram growth service, which increases your number of followers both safely and practically.
– Guaranteed: We guarantee to gain you 300-1000+ followers per month.
– Real, human followers: People follow you because they are interested in your business or niche.
– Safe: All actions are made manually. We do not use any bots.
The price is just $60 (USD) per month, and we can start immediately.
You can find out more information here:
http://instagrow.business/
If you are not interested, ignore this email and/or unsubscribe from further emails via the link below.
Kind Regards,
Gemma
Unsubscribe: https://unsub.agency/unsubscribe.php?d=affiliateplog.com
Set your keywords. Set your location, right down to the zip code. Vantovo’s AI does the rest, scanning a massive partner network and routing matched visitors to your site 24/7. Free for 7 days.
https://cutt.ly/0yjxWRzF
The longer the campaign runs, the smarter it gets. Vantovo’s adaptive AI scores keywords continuously, matches visitors from partner sites to your locations, and focuses on what drives engagement. Test it risk-free for 7 days—no contracts and cancel whenever you want.
Get more information and start your free trial here: https://blankslatelife.com
What if your website traffic actually matched your ideal customer? Our AI scans behavior across a large network, locks onto visitors who fit your keywords and target locations, and routes them to you. Try it free for 7 days with no contracts and cancel whenever you want.
https://cutt.ly/dyjxWMLO
Tired of traffic that doesn’t convert? Switch to AI-powered targeting that focuses on keywords and exact locations across a partner network, then learns from every visit. Claim your free 7-day trial today—no contracts required and cancel anytime.
Get more information and start your free trial here: https://blankslatelife.com
Hello,
I am Hayley Richey from FreeB2BData
It is with sad regret to inform you that we are shutting down
We have over 252 countries and over 33 million companies available in our database with phone numbers, industries, emails, etc.
Please come and download your data in the next 24 hours.
https://Hayley.freeb2bdata.org
Regards,
Hayley Richey
Real targeting without the usual complexity. Set your keywords and locations, and the AI continuously finds better matches and improves performance. Free 7-day trial. No contracts. Cancel anytime. Join clients already seeing results.
https://cutt.ly/oykOEh36
Most of our clients report clearer increases in leads and sales once they start receiving keyword and location-targeted traffic. Vantovo’s system learns and improves every day. You can test it risk-free for 7 days and cancel at any time.
https://cutt.ly/eykOWCsB
Real targeting without the usual complexity. Set your keywords and locations, and the AI continuously finds better matches and improves performance. Free 7-day trial. No contracts. Cancel anytime. Join clients already seeing results.
https://cutt.ly/yyzApz1H
Ready for traffic that improves itself? Vantovo combines keyword targeting, location precision, and continuous learning across a partner network so results get better over time. Most clients report increases in leads and sales. Start your free 7-day trial today—no contracts required.
Get more information and start your free trial here: https://blankslatelife.com
Tired of traffic sources that feel random or outdated? Switch to an AI system that matches visitors to your keywords and locations in real time across a partner network and improves daily. Try it free for 7 days. Cancel anytime. No contracts.
Get more information and start your free trial here: https://cutt.ly/iyblh06M
Test real keyword and location-targeted traffic without risk. Our AI continuously scores and optimizes performance, so results improve over time. Most clients notice increases in leads and sales. Start free for 7 days—no contracts, cancel at any time.
https://cutt.ly/pyblh6Ih
Focus on the people most likely to care about what you offer. Vantovo targets by keywords and precise locations across a partner network, then keeps refining the approach. Start a free 7-day trial today—no long-term contracts and cancel at any time.
Get more information and start your free trial here: https://blankslatelife.com
Imagine a system that gets smarter every single day it runs. That’s Vantovo. Every visitor outcome feeds back into the model, sharpening your targeting as it learns what converts for your specific business. Try it free for a week, no contract required.
https://shorturl.at/FbTPx
Paid ads make you guess. Vantovo’s AI doesn’t: it re-scores what’s working every few minutes and adjusts in real time, so your traffic budget always follows the signal, not a hunch. Start your free trial today.
Get more information here:https://da.gd/ePLlQ
Imagine a system that gets smarter every single day it runs. That’s Vantovo. Every visitor outcome feeds back into the model, sharpening your targeting as it learns what converts for your specific business. Try it free for a week, no contract required.
The difference is in the matching. Vantovo doesn’t just send volume—it focuses on keyword and location alignment and continuously improves the quality. Test it risk-free for 7 days. No contracts. Cancel at any time. Clients typically report better results.
Hi kindly send us an email via our contact us page, for brand PR or awareness, we can also add your in our website for our visitors to engage on daily basis.
I’m reaching out to see if you’re open to a relevant link exchange.We can offer relevant link replacement from one of our website,while your websites can link to another suitable website in return.We’d aim to match the placement based on topical relevance and content fit.If you’re interested,I’d be happy send over a few options for you to review.
Hi, kindly send us an email via the contact us page.